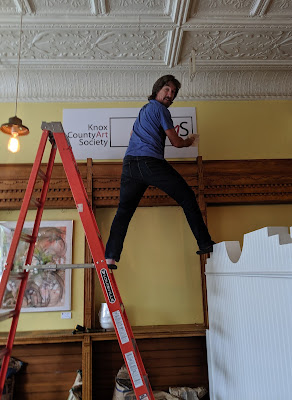
You can hang by eye, or measure. The latter will look better, I promise.
You’re bound to be asked to hang work a library, restaurant, beauty shop, or other non-commercial gallery space. These are great opportunities for exposure for the emerging artist, but they’re unlikely to have a commercial hanging system. You can either hang by eye or you can measure. The latter will look better, and it requires no math skills beyond what you learned in 4th grade.
You will need:
Hammer
Tape measure
Yardstick
Leatherman or equivalent all-purpose tool
Pencil
Scrap paper
A calculator
Strap hangers on pictures should be set 1/3 down from the top. Too low and they’ll roll forward; too high and the wire will show. When hanging a group show, you’ll inevitably come across paintings that have been wired too high or too loose. The all-purpose tool is to make those adjustments before you hang.
 |
| Lorilei Clayton and I started by laying the work out to see what would look best. |
Decide on the order in which the paintings will be hung. In an open room, this is not complicated; just stand them up along the walls and keep rearranging until you’re happy. In a small, cluttered space, you may need to lay small arrangements out on tables, floors, etc. Try to match colors and themes, but don’t be too rigid. A combination of realism and abstraction is pleasing.
Use the areas with the best visibility for large statement pieces. Put the highest-chroma/best graphic design in window spaces. Smaller pieces are better in smaller, more intimate corners.
 |
| Start with a basic map of each wall. The blue line is the chalk line, at eye height. The figures above are necessary to give you the centerpoints of each painting, unless you’re very, very lucky and all the work is the same size. |
Once you’ve decided on the order in which you want to your pictures, you need to make a basic map. Let us say, for example, that you want five pieces to hang along a wall. None are the same size. Total up the width of all the pieces. Measure the overall wall length. The difference between the wall length and the total width of your pieces is how much room you can leave for gaps. If, for example you have 110” of framed work and a 160” wall, that extra 50” is what you can leave between paintings. There are four spaces between paintings and two on the end, so if you want even gaps, they would be 8.33” each. That’s a stupid number to work with, so leave 9” on each end and 8” between paintings. A little juggling will give you reasonable numbers.
Find the center point of each painting and mark it on your plan. For example, if a work is 28” in its frame, the center is at 14”. I write all these out on my plan, as on the example above.
Run a horizontal chalk line. This is a two-person job. Snap this line at eye height—say 62” for an average American. This line will be your centerline for all the paintings. (It’s possible to align on the top edges, but I avoid that when possible.)
Now, you’re going to start on the left side and mark all those space divisions on your chalk line. It’s not strictly necessary to mark the edges of the paintings, and you’ll want to use an extra-hard mark at the center points, but it’s awfully easy to make a mistake here. Marking them gives a measure of foolproofness.
The problem with paintings is that the wire is never the same height on two works, even when they come from the same framer. You’ll have to adjust for that. Use a tape measure to figure out how far the wire hits below the edge when it is taut. Let us say it’s a 20” tall frame and the wire comes up to 1.5” from the edge of the frame. I know the midpoint is at 10”, so I subtract the 1.5” from that and place the hook—not the nail—at 8.5” above the midpoint.
Mercifully, this is all the number-juggling you’ll have to do.
 |
| At the end, you’ll level each painting and hold it secure with rubber bumpers or a bit of museum putty. |
Try to work from the center out. It’s easier to correct small errors on the edges. And don’t be afraid to pull and rehang a nail if it doesn’t look right to you—holes are easily filled with spackle.
On a vertical arrangement, measure the total height, calculate the gaps, and make a small drawing for guidance. Figure the center point and drop a chalk line down. Instead of working from the middle, however, work from the top.
When you’ve positioned the paintings properly, level them. I prefer to put clear rubber bumpers on them to stop them from moving, but you can also use museum putty for this.


