Nice advice. How exactly do you avoid making mush as the light changes?
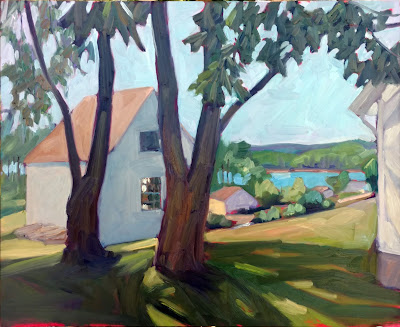 |
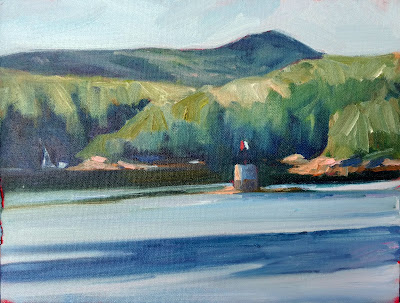
| The Thimble, Carol L. Douglas, oil on gessoboard, sold. |
I’m painting bigger this season, with the goal of doing some very large landscapes during my Joseph A. Fiore Art Center residency. Down the Reach from last week, is 24X20; The Thimble, above, is 20X16. Big paintings outlast the light. Having a protocol to deal with shifting light is essential.
One technique is to go back to the same location over many days. In the Northeast, weather is capricious. You’re as likely to come back to a sea fog as to the limpid light of the prior day. The tide doesn’t move in sync with daylight, meaning the light may be the same but the scene will change.
In many cases, it’s impossible to come back and set up at the same spot over and over. A little preparatory work will save you hours of frustration later in your painting.
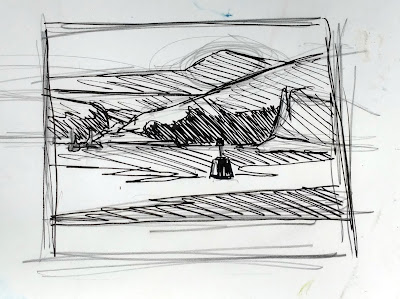 |
| Value sketch of the Monument. |
Make a value sketch.
In my classes I strongly discourage the use of viewfinders. The value study is where one explores relationships and determines the ‘final cut.’
Don’t make a bounding box and fill it in; instead, do a drawing and then crop it to the shape of your board. It’s in the value sketch that you can make subtle adjustments to the elements of the scene. You can’t do that when you’re slavishly transcribing a scene from a viewfinder.
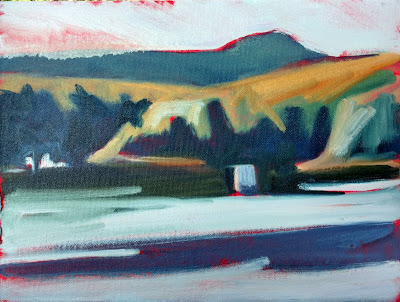 |
| Value underpainting for The Monument. This early in the morning, the light was warm. |
Choose a color scheme.
- Shadows are warm and the light is cool. This is what happens at midday.
- Shadows are cool and the light is warm. This is the golden light of early morning and late afternoon.
- Shadows and light are neutral. This happens mostly on grey days.
Choose one of these and stick with it.
Do a fast underpainting that’s a direct transcription of your value sketch.
I don’t look at the landscape very much at this stage. I have my sketch in my right hand and my brush in my left. I paint in the big dark shapes in an already-mixed shadow color and the big light shapes in an already-mixed highlight color. At this phase, my paint is lightly thinned with odorless mineral spirits or turpentine. Knowing how much thinner to use is a matter of practice. The paint layer should be thin, but there shouldn’t be so much turpentine that everything applied over it turns to mush.
 |
| The Monument, by Carol L. Douglas. |
Paint the details on top of that underpainting, making sure to retain your original values.
Go ahead and paint in details now, matching values to what’s on your canvas rather than what you see. During the great flat light of midday, you will have a good opportunity to paint into your already-defined shadows and highlights. However, at some point after the sun swings completely over the yardarm, you’re going to have to stop. Your light source will be inverted.
Make a drawn reference to any spectacular lighting effects that whiz by.
Atmospheric effects like crepuscular rays, breaking clouds and rainbows are transient. Before you add them, be certain they support your composition. If so, and you’re in a position to do so, paint them right in. If you’re not at that point of development, sketch what’s happening so you can refer back to your notes.
They may be beautiful but clash with your existing composition. If that’s the case, just sit back and enjoy them, or record them in your sketchbook for another painting.
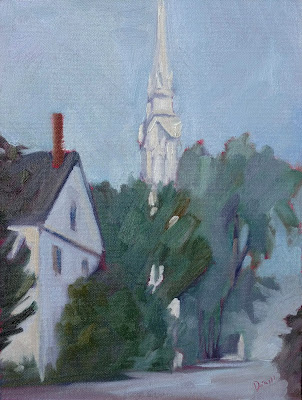 |
| Sea Fog on Main Street, by Carol L. Douglas. By the time I finished this, the fog had completely evaporated. My sketch and underpainting saved this painting. |
Notice there is nothing in here about capturing effects on your camera.
You should be able to develop a plein air painting without any relying on photo reference at all.
I’ve got one more workshop available this summer. Join me for Sea and Sky at Schoodic, August 5-10. We’re strictly limited to twelve, but there are still seats open.


